Pages

Showing posts with label Sewing. Show all posts

Friday, July 20, 2012

Sailing Away


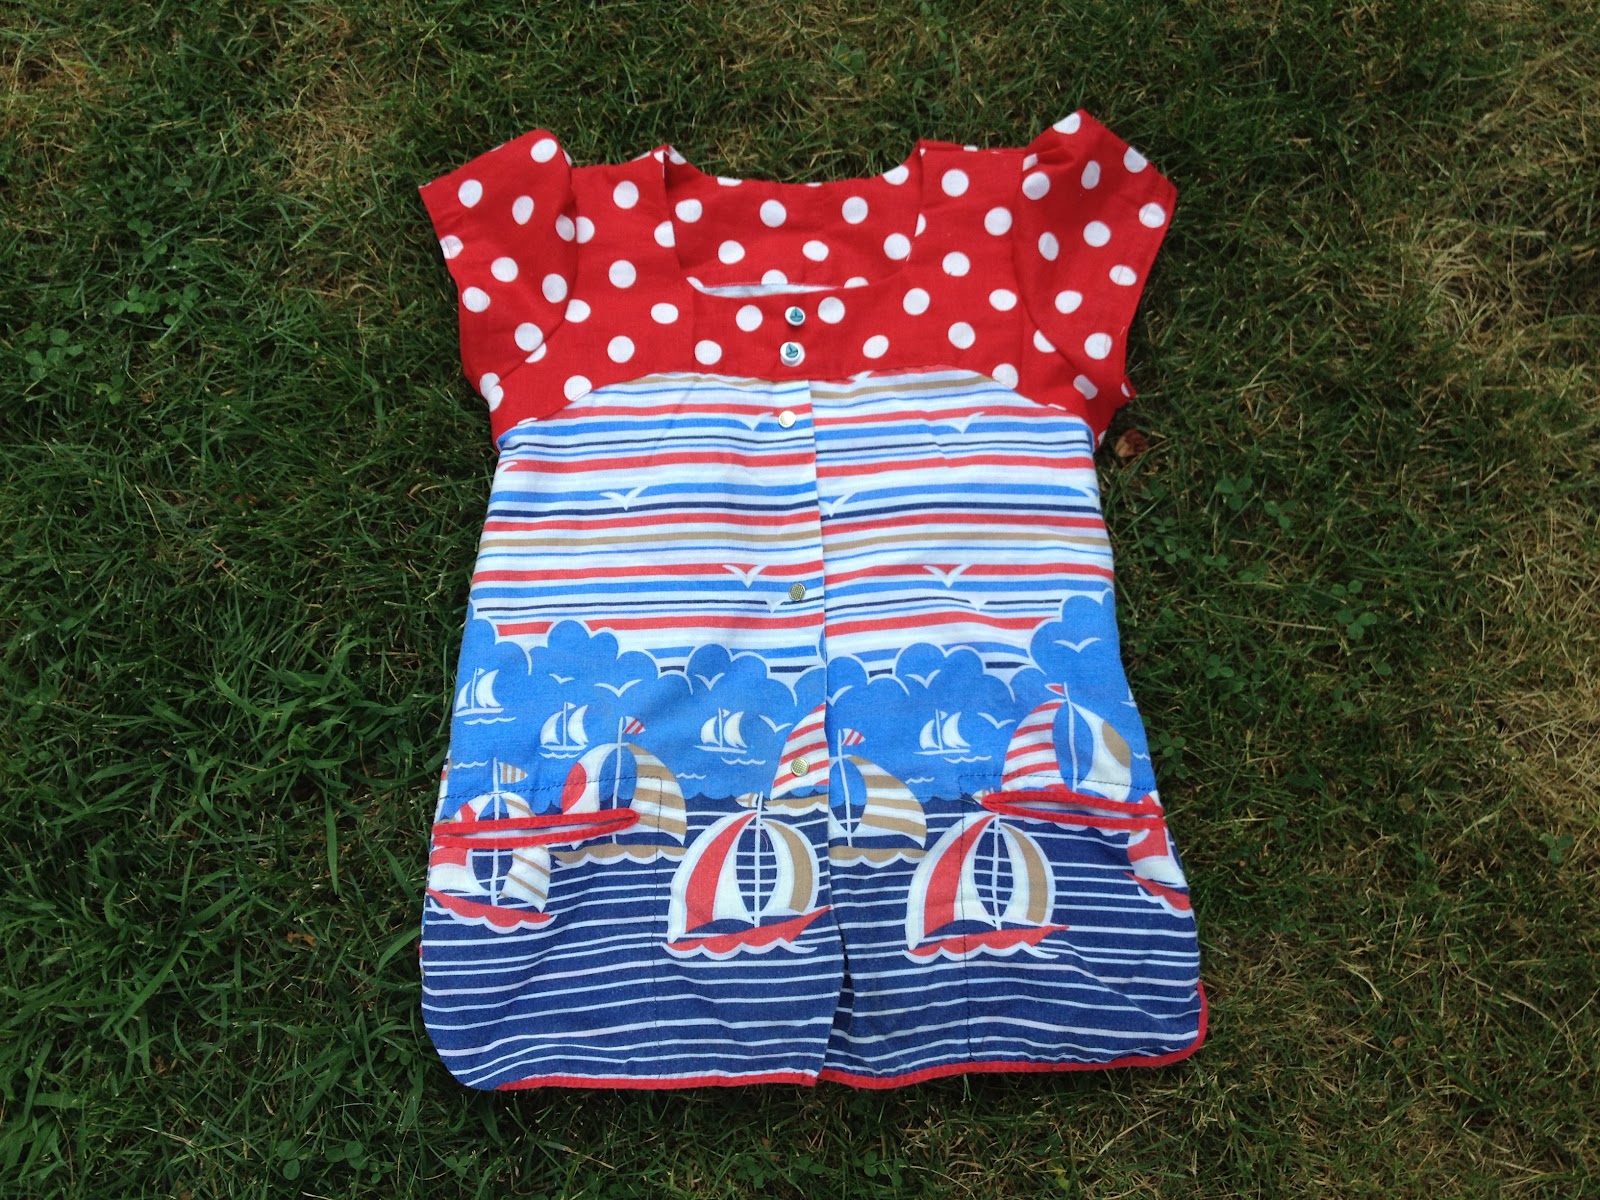
My seester saw my pretty blouses (this one and this one) and let me know it was time to make one for her, asap.  Sailboats, red and blue, polka dots, nautical buttons... those were the orders.  Before she had even finished her sentence, the shirt was made in my head.

You had me at "sailboats."

Ya see... one of the aprons of Gigi's I'd been holding on to... well... it was red, and blue... and sailboat patterned.  Perfect.  So my seester, she got herself her very own Gigi blouse!

I feel like I'm kind of a pro at this pattern now.  If you haven't made one yet, you totally should.  It's such a quick one to put together, and the result is really nice.  If you just hold it up, the finished blouse has a tendency to look a bit like a sack... but once you put it on, it hangs nicely and, to quote Raina, "It is so soft and cozy!"  :)

To mix things up, I tried my hand at cap sleeves... and although I'd like to try a non-poof version some time, I think the cap sleeve was successful.


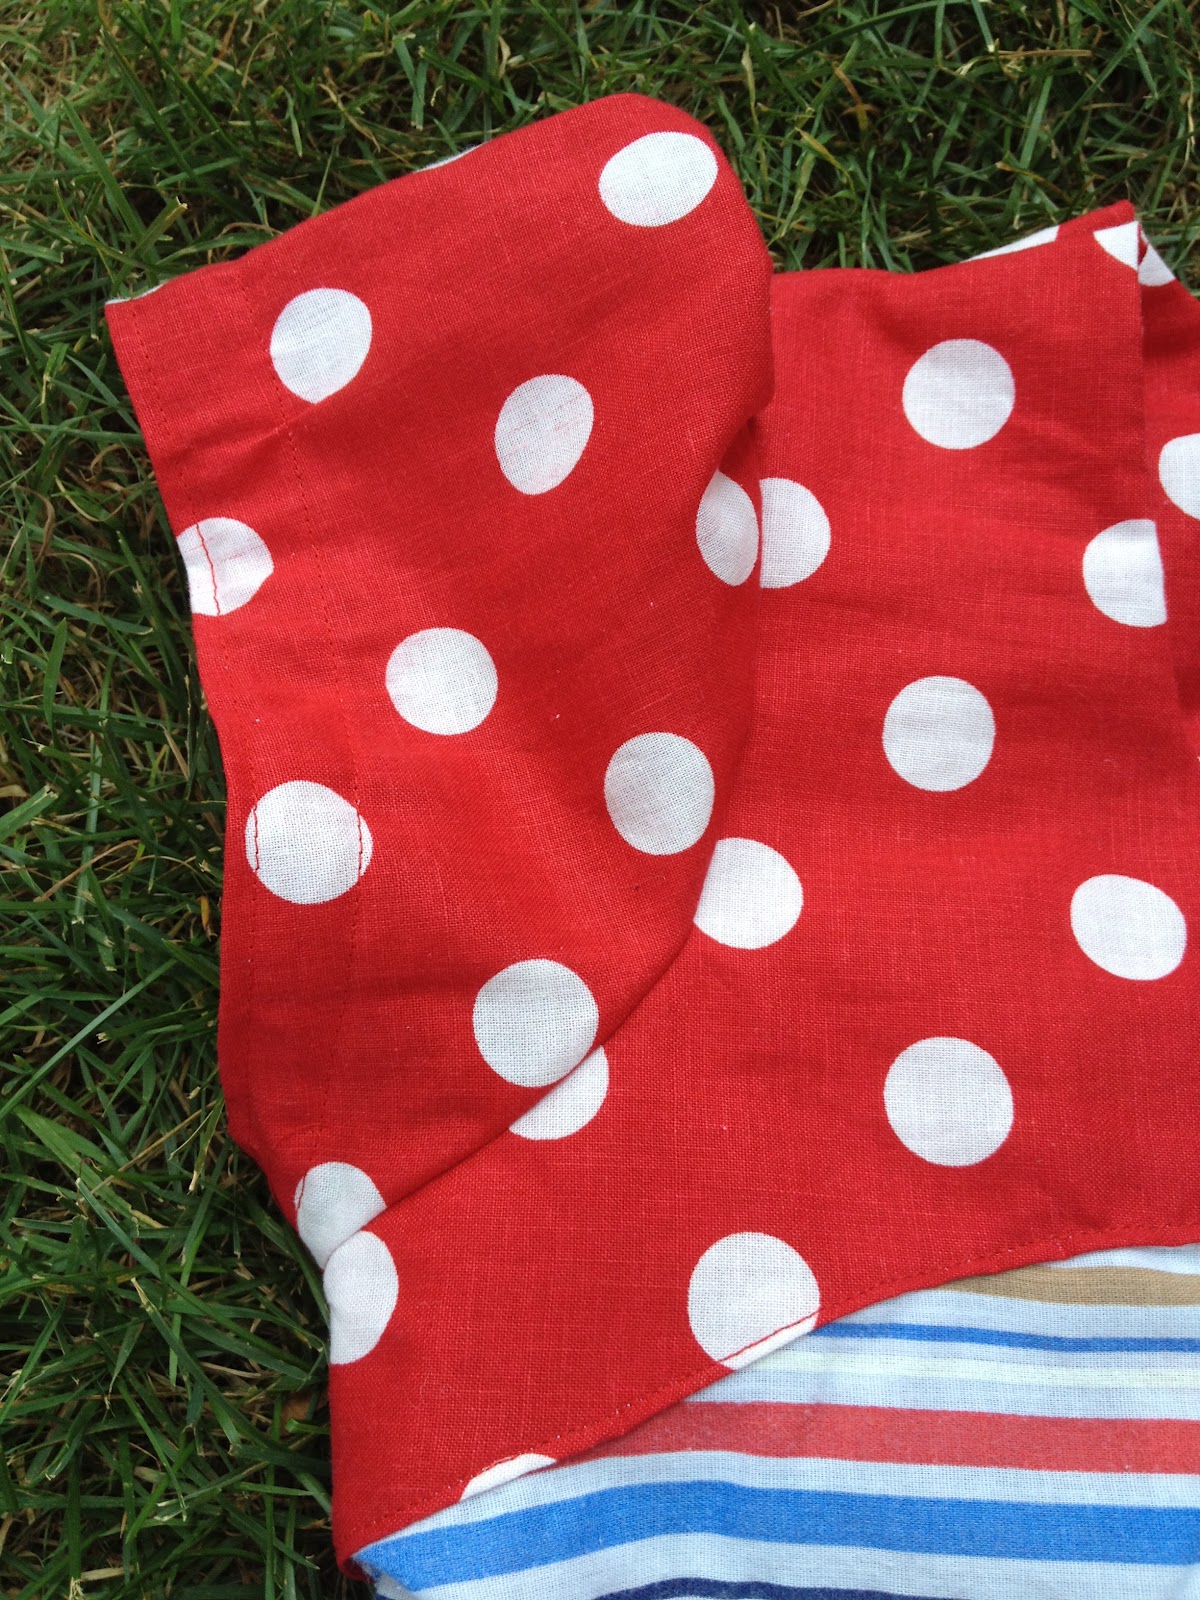
I'm pretty excited about the double stitching on the edge.  I was careful to sew straight across the white spots, because of course, if a mistake was going to happen, it would be on the most obvious location!


POOF!


The buttons were what held up the finishing, if you can believe it!  I tried for an anchor button, but short of ordering one online that cost as much to ship as the button itself, I was batting zero.  By some stroke of luck, I found these tiny sailboat treasures at JoAnn fabric while I was playing there one day!


I love this fabric.  This particular apron was one I had pulled out to look at quite a few times, wondering what project would really have me ready to cut into it.  I considered a dress for Lucca, I considered another shirt for myself.  I am so glad I saved it for seester.


She got to keep the pockets:


I got to add some fabulous bright red dot for the top:


my topstitching came out awesomely awesome:


Each one of these aprons seems to be finding it's own special way to live on.  I'm sending this one off to my bestest sis with memories of roller skates and Roy!


Wednesday, July 18, 2012

Summer Break, and some 4th of July dresses

I've been on it :).

It's been a month since my last post.  Ugh.

I've been sewing a lot of things... and finishing no things!  There's just too much summer to enjoy!  Beach time, playgrounds, kiddie amusement parks, boat rides...  no time to stay inside, enforce naptime, and get some crafting done.  I feel a bit scattered, and my sewing table is, uh... embarassing in it;s mountainous state!

Last week, I did manage 2 4th of July outfits for Raina and Lucca...


I can pull off a one afternoon upcycle like nobody's business!

Raina's dress is made from a one-piece romper we got handed down a few days before the 4th.  I showed it to her, used my most excited Mommy voice, waved it around a bit... no go.

"That is not a dress."
"Will you wear it if I make it into a dress???"
"YES!"

So i sliced it, added 2 ruffles, and she was pleased as punch!  (I think she was still more excited about the Tinkerbell PJ pants I found at a thrift store though!)


Lucca's is made from the onesie Raina wore on her first 4th!  It was a *tad* on the waaaaay too tiny side, however, so I gave it the same treatment as Raina's:  Slice, ruffle, ruffle.  The end!


Cutie patooties, patriotic style!

Here's a few more shots from our 4th!


And if I could just ask one thing.... can you send me all your best "get that sewing done!" vibes?  I think my table is about to collapse.  :)

Friday, June 22, 2012

Sleeveless Tova Dress (for moi!)

When I first decided it was time to sew something for myself, I did some serious interwebs research through my new favorite search engine:  Pinterest!  The pattern that kept popping up and catching my eye was the Tova!  I saw so many variations... like this one, and this one, and this one.  The price of the pattern deterred me at first, but I finally bought the PDF, and since I've already made one and cut a second, I think I'll get my money's worth!  While the variations are many, I finally decided that for my first Tova, I'd go sleeveless (allowing me to wear it right away!) and in a knee length dress length.  My fave summer outfit is a dress with leggins and sandals, so why not add some variety to my go-to outfit? 

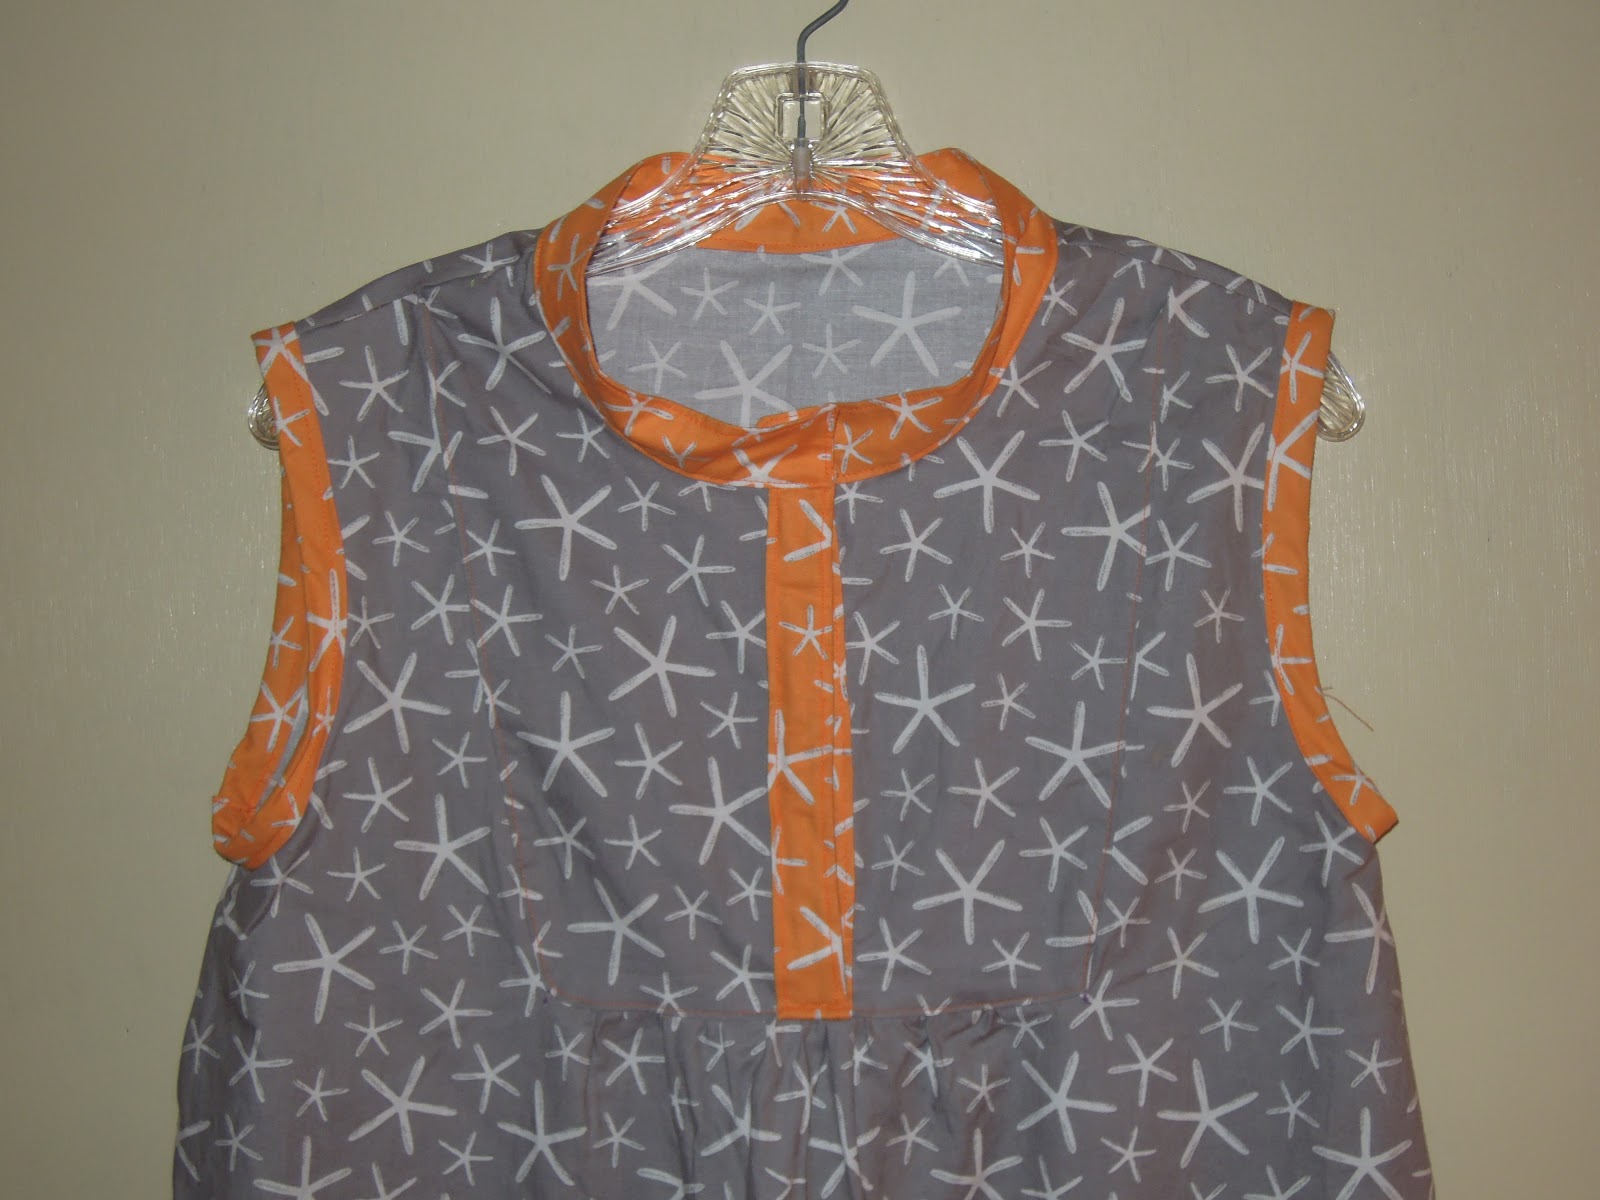
The fabric is something I ordered a month or so ago, when I had just decided to make something for myself, but realized I had very little "grown up" fabric!  It's from Michael Miller's "Going Coastal" collection - sea stars in grey and orange.  I usually don't go for grey, or any neutrals for that matter, but this one appeals to me, and the orange coordinating fabric sets it off with just enough pop of color.  Also, it looks good with black leggings and orange sandals... both of which are already in my possession.


In some of the pictures, it looks like a real sack of a dress.  I was pretty nervous sewing it up that I was, indeed, sewing myself a very pretty sack.  But in the end, even my husband thought it was a really cute dress!  He's always the first to offer "constructive criticism" when it somes to my sewing and craft projects, so when the forst words out of his mouth are a compliment, I take it as a really good sign!!  I did end up taking it in a bit under the arms (this one is a medium, to compensate for my not so skinny hips and thighs), because while I am wide in the hip area, I do not have that same issue in the chest area! 

Other than that, I made 3 additional changes to the pattern.  The first, and most obvious - sleeveless!!  My original plan was to make the sleeves as in the pattern, but I also really wanted to wear the dress sometime soon!  And, uh, the print, being starfish and all, is a bit on the summery side to be long sleeved and intended for the fall.  To make it sleeveless, I simply made bias tape from the orange fabric and bound the unfinished armholes with it.  Incredibly easy, actually. 

Sleeveless!!

The second change, more for decoration than anything else, was to add vents at the bottom.  I didn't wan it to be tight at all around my knees.  I move and bend A LOT during the day to keep up with my kids, and having a dress that makes that difficult means that I just will not wear the dress, and that's a shame!  Additionally, I was looking for another place to add in some of the orange starfish.  It's extra from the bias tape I made to go around the sleeves, and took about 5 minutes to add on!


Third, and finally - I added a strip of the orange starfish to the insides of the front bodice where it opens.  I did this for a few reasons:  One, because it added more orange.  Two, because I think it looks more finished than seeing the underside of the grey printed fabric when the front is open (and when wearing, it usually IS open).  And third - when I sewed the edging onto the front and top-stitched, my machine did something wacky and made all kinds of extra loops in the underneath stitching.  This covers it, and allows me the opportunity to not seam rip to death the front of my otherwise lovely dress!


I like these changes, and think they made the dress much more wearable for ME.  Next time, I'm going to alter the collar - halving the width and rounding the corners, a-la this post.  (FYI, that link also takes you to an extremely helpful Tova sew-along.  Some awesome tricks and tips!)

(My collar, two ways)

closed, pulled straight, plackets lined up:


loose and open, and the way I'll likely be wearing it:


Also, I love me a dress with pockets.  I think the Tova dress could absolutely work with pockets... either slash pockets here:


or front patch pockets here:


You agree, yes?  Sometimes a Momma just needs a place to keep bandaids, cell phone, and a couple dollars from the iced coffee fund without lugging around a 25 pound diaper bag!  Obvi, the pockets would not be purple, or would at least be the same color purple... and would be appropriate sizes and all that :).

Here are some of my favorite details, in picture form:

(starting from large picture, then going clockwise)
1.  Bottom of front placket (placket!  that's the word I've been searching for this whole post!!)  Shows the orange stitching well, and the front pleat detail.
2.  Left sleeve, bound with handmade bias tape
3.  Inside front placket, lined with orange fabric
4.  Front placket
5.  Right sleeve
6.  Dress hem, two lines of orange contrast stitching

This was a pretty quick sew, despite my worries that it would be exactly the opposite with that front inset piece.  Omitting the sleeves, probably helped with that, but making the bias tape added time back on... so I'm probably pretty accurately even on time there.  I'm looking forward to making a bunch of these tops in different lengths and with different sleeve types.  The cut and fall of this shirt are absolutely my style, and I can see myself making loads of these.  If you make your own clothes, have thought about it, or like to have other people make clothes for you (my sister is guilty of this one!), then the Tova pattern should be in your home, and well loved.  Versatile, easy to wear, flattering.  Good things. 

I've already worn this one mutliple times... and I was actually frantically hand sewing my lining on the placket the morning of the first time I wore it!  I just couldn't wait to put it on.  And some day, really, I'll get my act together enough to actually iron a piece of clothing before I photograph it and blog about it!  :)  I'm probably embarrassing my mother with all of these rumpled pictures.

rumpled hem!

rumpled collar!
If you're on Pinterest (and if you aren't, why aren't you?!), type "Tova" into the search box and you'll get all kinds of results.  So many ideas for fabric choices and alterations.  Can't wait to see what my next one looks like!

finished Tova, and my mom's door :)  hooray!
Thursday, June 14, 2012

Baby Clothes Quilt: Making progress!

I'm making progress, pinky swear!  It's been a much slower-going project than I anticipated.  Probably for a number of reasons... here are a few of them, in no particular order:

1.  I'm finding that some things are hard to actually cut.  I could cut up onesies and pj's all day long, but those stinkin cute little dresses?  Rough.
2.  I like to work on other things, too!
3.  When I decide something is officially outgrown (which I hate to do!  and usually, things stay in the drawer a bit longer than they actually should...), it gets tossed into a bin in the closet in our master bedroom.  Lucca goes to bed at 7:30.  So anything I haven't brought downstairs early in the day is off limits for evening working-on.  Boo.
4.  I'm trying to be detail-oriented in the cutting, making sure to save the trims, patches, pockets, and other cute details.  This adds minutes to the cutting.
5.  Oh yeah, I have 2 kids to take care of and dinner and laundry and all that other housefrau stuff.

Just a peek at my work as of late:

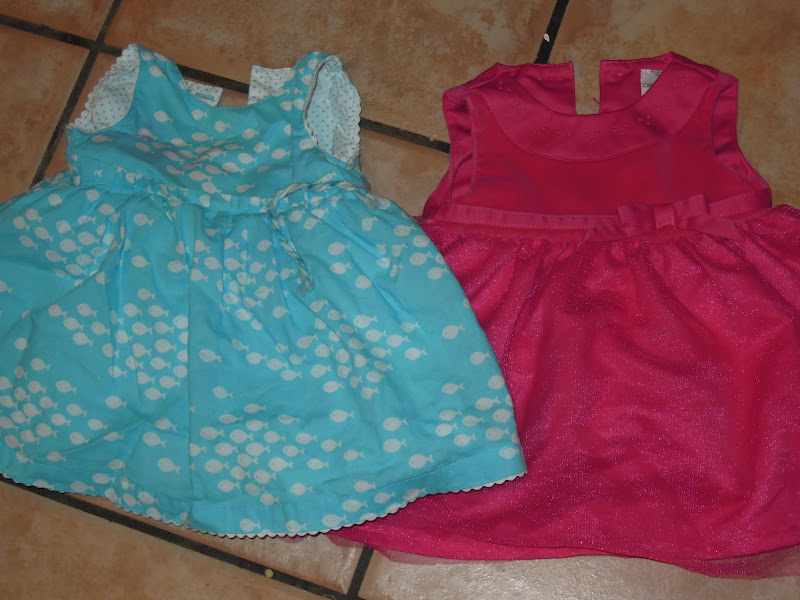
dresses!  so hard to cut into these pretty little layers!

stack one!

stack 2!

feet! 

not sure how I'm going to incorporate these into the quilt... but just look at this face!  how could i NOT let him join the quilt party?!

I'm sure there has to be a point where I just have to start laying things out and sewing rows together.  It seems like I could let this go on forevs, since both girls will continue to keep outgrowing their clothes!!  I have to start somewhere, though... and maybe it would be nice for the set-up of the quilt squares to be sort of chronological!  I hadn't thought of that until I typed it, to be honest.  Like the rings on a tree.  Yeah, I'm getting really out there now.  But for really reals... the center would be the newborn, 3 months, 3-6 months clothes, and the squares surrounding it would be 6-12-ish... and then for Raina there would be another section around it with some big kid pieces.  I like it!

My next post on this quilt will have real actual pictures of squares completed and sewn together into rows and/or blocks.  I wrote it down, and now it's a pact (between you and me, blog readers!  Hold me to it!)

My goal is to have these done in time for them to not include t-shirts with pictures of boy bands on them!  :)

Pants.


I have soooooo many sewing chores to do.  So many projects partially completed.  Blanket orders, dresses, yellow pants, 2 quilts...  it's bad.  My sewing table exploded.


However.... a certain 3 year old was rather insistent that my precious few minutes of daytime sewing should include new pants for her creep-o doll, Olivia.  I resisted, she persisted.  There were tears and there was whining.  I hate whining. (Despite it's almost perpetual existence in my house, or maybe due to it!)  I told her she could help sew!  I gave her some fabric, scissors, and free reign to create!  Still... she wanted PANTS!

So Olivia got some pants.


I used no pattern.  I held up 4 scraggly pieces of fabric, lined them up kinda sorta, and cut out a shape that looked like a pants pattern in a size I hoped would fit.  I didn't pin them, I just sewed.  I used bias tape that didn't match for the elastic waist, and orange thread because it was in the machine.  And a mermaid button.  They fit!  They are cuter than I expected.


Raina is thrilled.  And Olivia looks much warmer.  The pants don't do much to help her in the creep-o department, though...


Now it's almost 10 pm.  I've made doll pants.  I've blogged about doll pants.  Maybe I should try to put a dent in that sewing mess now? 

Monday, May 28, 2012

Pretty Summer Blouse


The newest chapter in the "sew something for myself!" series!  See, I told you I've actually been doing some sewing, not just writing tearjerkers.  :)

Honestly, though, I've been working on this one for quite a while.  It's an easy pattern, but I had so much going on, and it just kept getting hung over the back of my chair and then inevitably something would get hung over it and I'd forget for a few days.  Oh, did I mention it's also a FREE pattern?  THat comes in multiple sizes?  For really real!  You can download it here:  Pretty Blouse pattern  For free!

Did I mention it's free.

Okay, I'm over it now.

As I was sewing, it seemed like I was making a tent.  So.  Much.  Fabric!  I kept having to remind myself that yes, sewing mommy's clothes uses more fabric than sewing toddler and baby clothes, and it was going to be okay.  Even when I was almost done, I held it up and thought, "What the heck kind of a mumu is this?!  Why did I waste my pinwheels on this?!"

But in the end. I love it.  Even more so with the addition of the button.  It's wooden, with white paint.  I wish I could tell you it's vintage, or that I salvaged it from an amazing thrift store, but I bought it at JoAnn's.


At times I questioned the use of the pinwheels.  It's really a kids fabric.  I mean, the line is called "Children at Play."  But I love it so much!!  And I think the navy with white polka dots really works with it.  Not too busy, and the dots make it more grown up.  Or it's possible that since I spend pretty much all of my time around children, I am absorbing their dress code.  I can live with that.

so you can really see the pinwheels, and also the pretty neckline.


A few years ago, before Raina was born, I was with a group of church friends.  I had gone to join them straight from work as a preschool teacher, so I was dressed for the occasion, but I don't think my outfit was anything I would have thought twice about wearing on a non-work day actually.  One of them said to me, "I wish I had the courage to dress like you."

Uh... thanks?  I decided to take it as a compliment.  I felt confident and happy wearing a pink jersey dress over a button up shirt, with jeans and purple converse at the ripe old age of 27.  I still think back on that comment fondly, and try to dress in a way that people wish they had the courage to emulate.  (Not always easy with this post 2 baby bod, but I'll be back in top form some day...)  (And also, did I just use the word fondly?  Maybe I'm older than I thought!)

Any way, here's a few extra pictures...


I'm working on a second one already, minus the poof sleeves.  (Spoiler Alert!  It's a companion piece to Lucca and Raina's Gigi dresses!!)