Pages

Sunday, April 1, 2012

Rawr! Rainbowsauraus Rex Hoodies


Hoodies are awesome, but sometimes you just need to fancy them up a bit, you know?  

Most of the time I add ruffles to things.  But my girls have lots of ruffles.  I wanted something fun and silly and cute.  DINOSAURS!  Not always the words picked to describe them, but translated through felt and cute little hoods, I knew they would fit the bill!

First I grabbed two hoods from upstairs, one for each girl.  Lucca's is gray, Raina's is light green.  Today when I was doing the laundry I came across a red hood of Lucca's and I am so templted to do this again!  Maybe a gift?  Hm.

Next step, felt.  I happen to have a box full of it, so we went rainbow.  You could also stick with just one color.  Fold the felt in half, and cut a triangle on the fold.  I kind of guessed on the size, looking at the hood and cutting what seemed like an appropriately sized spike.  I ended up having to trim them all down smaller so that I could fit on more colors.  The smart thing to do would probably be to measure from the edge of the hood to the bottom of the back, then divide by how many spikes you want to figure out how long the base of each should be.  Math.  Or, you can just go for it and adjust as necessary!  :)


Once you've got a bunch of colorful diamonds, arrange them in order of how you want them to be pinned.  Find the center, and line up the side points on that center.  I was moderately precise, and it worked out well.  I just kept folding the fabric in half as I went... I'm sure it's a little off, but it looks perfect to met!  


Once they are all pinned on, sew a line down the center.


Then fold all spikes back up together and pin.  Each spike will be double thickness, giving it more stability.  Sew the spikes closed.  I matched thread to spike, but I thought about doing the whole thing one color.  If I had had silver thread I may have done them all one color, but I'm really happy with the way it turned out!  


And that's it!

You could stop there, but I added some extra RAWR!  I have a pile of scrap fabric already fused onto wonder under that makes itself useful from time to time.  (They're scraps from personalizing my taggie blankets!)  I cut some letters from the scraps and ironed "rAWr" onto each hoodie.  Exactly the finishing touch I was looking for!  


(Hoodies, dino-style)


And now for the best part... the dinos themsleves!  Here we have the elusive Lucca-dactyl and Raina-saurus in their natural habitat.  Rarely seen creatures!  


dino kisses

dino hugs

counting sister's spikes


RAWR!


seriously cute.  OMG.

Men's Dress Shirt Refashion - 2 for the price of 1!


I scored this XL French Connection RAINBOW shirt at a local thrift store for $7.99.  I knew it was the perfect shirt to finally try a shirt to dress refashion!  As an added bonus, I was able to get a pair of pants for baby out of it, too!  Woohoo!


The first thing I should have done was iron the shirt.  But I have a time limit for sewing projects (hello, naptime!) so I just went for it!  I folded it in half and cut off the arms.  


Then I grabbed one of Raina's current dresses to use as a guide for sizing.  (This layout has nothing to do with how I actually cut out the pieces, BTW.  I thought I might cut it differently at first, hence the lined up armholes, but decided not to go that route!)


I cut it into 3 pieces next:  A nice big chunk from right under the armpit, all the way across the shirt, a rectangle above that about 4" wide, and the top piece with the collar.

it seems I only took a picture of one of these 3 pieces.  Sorry about that :)


I gathered the large rectangle, then lined it up (both pieces open and unbuttoned) right sides facing with the smaller rectangle.  After pining like crazy, I sewed them together.  The stripes on this shirt are confusing really awesome, so sometimes it was hard to decipher which side was right and which was wrong!  I was glad I waited until the end to cut off all the tags!  It made it much easier to keep track of which side was which.


Can you see the mistake I made?  Yeah.  Make sure both rectangles are facing the right direction before you sew them together!  Oh well.


The straps are made from 4 pieces of ribbon sewn on securely, and cut into a "V" to prevent fraying.  The top of the dress is hemmed with one row of white and then top stitched with two rows of red for some decoration.  


Then I decided to add pockets.  They are made from the top part of the shirt, the one I wasn't sure if I was going to use.  I trimmed the back top of the shirt right next to the seams, and then cut it into a cute shape.  The top of the pocket is made from the collar!  Each pocket is decorated with a bow that matches the straps.  When I was taking the pictures, I noticed that despite my best efforts, the pockets are obviously two different sizes.  The collar top was sewn on higher on the left pocket, making them appear to be very different sizes.  I considered ripping them off and fixing it, but decided to just let them be.  


And the finished dress:


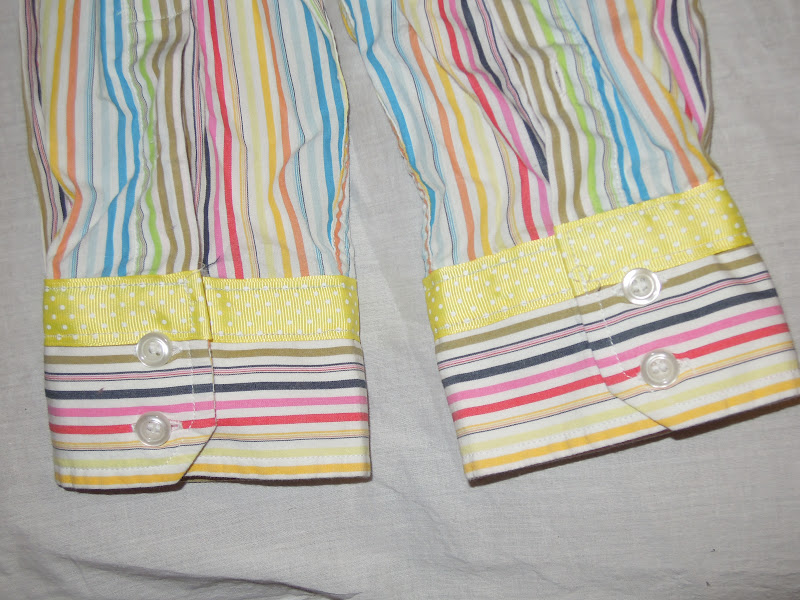
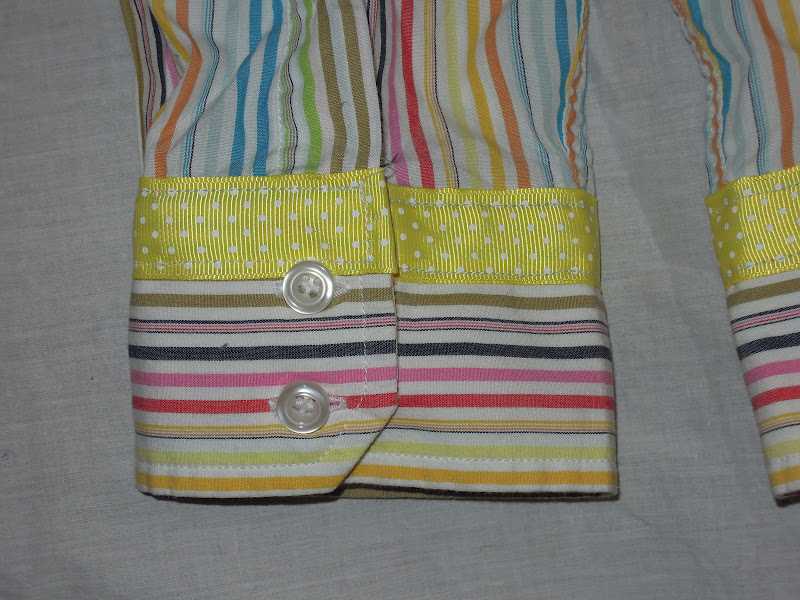
And Lucca got pants!  I traced a pair of her pants over the sleeves and cut it out.  Sewed up the crotch, added an elastic waist and some ribbon at the ankles... voila!  Baby pants from sleeves!


Rainbowy goodness.  Two outfits, one shirt.  Happy day.