Pages

Showing posts with label Snow White. Show all posts

Tuesday, May 1, 2012

Kids Clothing Week Challenge: My Secret Mission


Last week was kids clothes week challenge!

I was excited, but tried not to be.  :)  Some weeks I'm super productive when it comes to sewing... but some weeks I'm lucky if I get a pattern traced and cut!  So I decided to follow KCWC in secret, just to see if I could do it.  The commitment?  One hour of kids related sewing a day for 7 days.  Seems pretty attainable... but things happen.  (Like no naps, babies pulling all nighters, spilled toddler potties, grocery store melt downs, Dora movie-thons... you get the picture!)

Somehow, though... I did it!  One hour a day, and I came away with 6 completed sewing projects, one nearly complete one, and a finished quilt that had nothing to do with kids clothes.  :)  I'm feeling pretty accomplished!  

One day I spent as much time battling with my sewing machine as I spent sewing.  
One day I fought with a seam ripper.  
One day I sewed while a handyman played under my kitchen sink.  
Many times I sewed while Lucca jumped to her heart's content in her jumperoo.
Many times I drank too much coffee and didn't sleep enough.  :)
EVERY time I was so thrilled when I was finished that it didn't matter!


Raina's Gigi Dress

The rainbow gown

treasure pocket pants

Snow White raglan

Lucca's Gigi Dress

strawberry shortcake popover sundress

(all except Lucca's Gigi dress have posts up about them... watch for the last one this week!)

It's been so much fun getting inspiration from the host blog and from the KCWC flickr pool.  I have a million and one more things I want to make now!  

...and now, in the wake of all this kids sewing, I've realized that while I do loads of sewing, I've never made anything for myself!  So my next project, out here for everyone to see and call me on if I stall... is to make something for ME!  I started a pinterest board with ideas... if you have any you think I need to add, please leave me a comment!  I've got some fabric stacked, some ideas in mind... now it's time to put my nose to the sewing machine and get going!


Sunday, April 29, 2012

Snow White Raglan Tee


So normally the way I resize a grown up t-shirt into a toddler t-shirt is to fold the big one and a tiny one that fits in half, lay them on top of each other, cut, sew, and hope it is still wearble.  :)  Usually it is, but I thought it might be nice to try something a little more "for real" and refashion using a pattern.  I used the raw-edged raglan tee pattern from the book "Sewing for Boys."  (See my previous post about treasure pocket pants for more info on this!)

Raina is totally into princesses ("princies") right now, so when I cam eacross this Snow White shirt in my "do something new with this" pile, I knew it would be the perfect starting point for the raw edged raglan.  Based on the advice of another blogger who's made this shirt a few times, I made just one change: cutting the neck band one size up to accomodate Rain's cantelope noggin.


This pattern and the resulting new shirt came together so quickly and easily that I didn't even stop between steps to take pictures!  Here's how it looked mostly done, when I stopped to go to bed one night:


And here it is, all done and with a neckband:


I was a little worried about the neckband.  In the past, when I've sewn with knits and attempted to add a neckband, it's ruined the whole thing.  It ends up all stretched out and wacky looking.  Fortunately, this time I must be working with some new knowledge, because it came out a-okay!  Here's to hoping it *actually* fits over Raina's head in the morning!  She knows it's waiting for her, so if it's too small... mama's in big trouble...


I was initially unsure about the "raw-edged" part of this raglan.  Would I regret it?  Would I wish all the edges were neatly inside?  Nope!  I'm happy to say I like the finished product, though I do think I'll try an "inside out" raw edge and see how that looks, too!  I have saved quite a few of Jason's shirts from the big t-shirt party in the sky, and they would be perfect for this.

Sunday, March 4, 2012

We had Snow Much Fun Today!

Raina's really been missing the snow.

Last year we had SO much that we were literally snowed in the house for days at a time.  This winter, I was beginning to think that the most we'd see of snow would be this art project we did last week:


Much to Raina's delight, we finally got enough snow to play in the other day!  And much to my delight, the roads were still warm enough that while enough collected in the yard to play with, there was no shoveling necessary!

Our adventure, in pictures and captions...

Outside!!

We brought out a spray bottle, filled with water and red food coloring.

Next time, I'd use a different color.  The red splatter everywhere made it look a bit like Halloween.  Not that Raina noticed, but it creeped me out a little.

Everything got spray painted.

Extreme spray painting

We dug in the planter box...

And used tupperware containers to make "snow"castles! (that we painted, of course!)


I painted Raina's name in the snow, she told me to "Stop it with the letters!"  :)

Raina was HAPPY!

Lucca fell asleep almost as soon as she got out in the fresh air.

Peaceful sleeping baby

So we put her in a cozy little carseat nest!

She woke up happy.

I touched her feet to the snow...

Let her watch Raina play...

But then she got mad.

MAD.

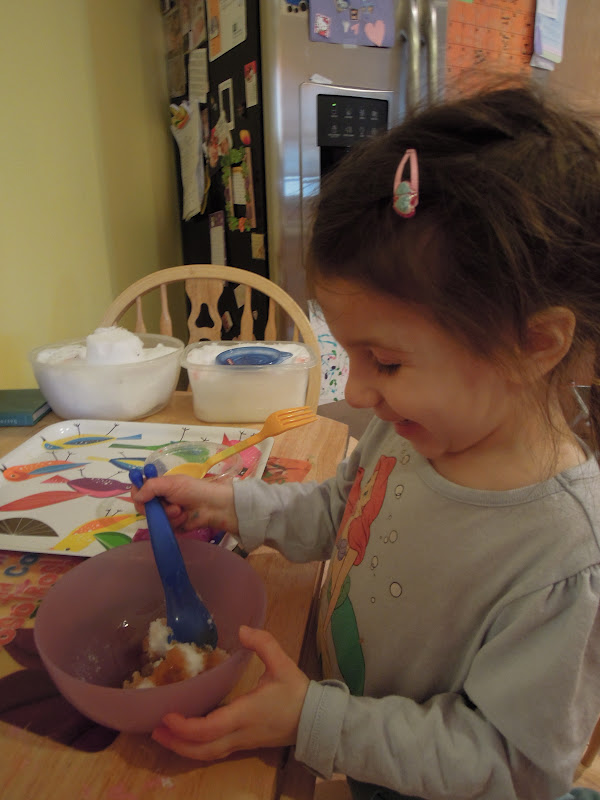
So we went inside, and ate ice cream drizzled with maple syrup!

Raina could not believe her good luck.  Eating snow?!


YUM!  (See that messy sewing table behind her?  That's my life.)

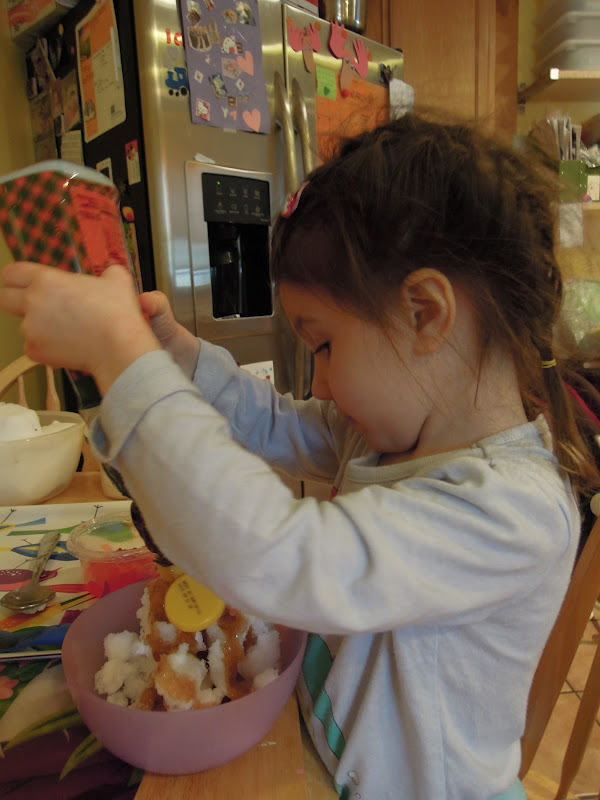
Refill!

Letting her pour the syrup.


Then it melted and looked like this in the bowl.

So we put it in a pan and cooked it!

Then we made this.  (But I had to stop taking pictures, because I was stirring hot syrup while taking care of a baby and a toddler, and the taking pictures part seemed a little unsafe :) )

Making maple sugar snow candy!


YUM!

What's your favorite wy to spend a snow day?

Saturday, March 3, 2012

Red Riding Hood Cape, by Oliver & S


This cape is the reason I wanted the Oliver & S book "Little Things to Sew."  I fell in love as soon as I saw the little illustration on the cover... but I was sure the pattern would be too complicated for me.  Turns out I don't give myself enough credit :)


If you've read any of my previous sewing posts, you'd know tat I don't follow patterns well :)  For this cape, which I wanted to come out perfect, I tried my hardest to stick to the pattern.

Some things I changed:
*I left out the armholes.  I don't think Raina would like them... she gets easily annoyed by sleeves she can't pull down to her wrists!
*Topstitching most edges.  Not in the pattern, but I like topstitching and the finished look it gives.
*Pom pom trim.  Why not?  I added this between the layers when they were sandwiched right sides facing.  It adds a really fun touch!
 *Instead of a button, I used a small butterfly patch, sewn just in the center.  It functions as a buttun without being a button!


Next time:
*I would add pockets inside for treasures!
*I think a drawstring feature might be nice for the hood.  Or some elastic (but not too much).  The hood can be floppy, and while it's really cute, I think giving it the ability to pull a bit taughter would also be cute.
*I'm thinking about adding a ruffle to the hood, like I do on my bonnets.


What I used for fabric:
*Lining - quilting cotton
*Outside - Red wool suiting
*I'm pretty much in love with the fabric.  The suiting wasn't inexpensive, but it was worth it.  The color is great, and the drape is exactly what you want from a cape.  (rhyme!)
*Just as a note... I'd like to give this pattern a try in a variety of fabrics now!  I think a fleece one would be a cute and cozy play cape!


Pattern pros:
This is actually a pretty simple and easy to construct pattern.  The instructions are clear.  I have no complaints about following the pattern.  But...

Pattern Cons:
The book comes with a giant sheet of patterns for every project in the book, and they are all printed on top of each other.  I was totally overwhelmed by the pattern sheet when I first opened it.  I had NO idea what to do with it.  First I had to decipher which pieces were for thecape, then I had to figure out how to use them without ruining the rest of the patterns.  I ended up using a roll of Raina's easel paper, tracing the pieces out one at a time, copying all markings, notches, etc over, and then cutting them out,  It was a lot of work.  I'm interested to see if anyone has a better solution for this kind of pattern!


I wish I had some pictures of Raina in her cape to show you.  Every picture I've attempted is blurry though. That girl cannot stand still!  She does love it, and she's sure that this is the witch's cape from Snow White!  Her favorite thing to say while wearing it?  "Here's an apple, dearie!  Now go to sleep!"