Pages

Showing posts with label rainbow. Show all posts

Friday, October 12, 2012

Blogging mojo. (And a kid project)

I have a pocketful of excuses, and none of them seem legit enough.  Sometimes life happens.  In the end, that's what it all boils down to.  Blogging started to feel like another chore in my life, and that wasn't... isn't... what I want this blog to be.  So I started asking myself what I want from this blog.  What were my intentions when I started it?  I didn't want it to be a daily churn out of "look what I made!"  ...and that's kinda what I felt like it had evolved into.  I was sewing like crazy, writing too late, and losing steam.  I was linking my posts all over the interwebs, trying to get traffic and followers... and I ended up actually LOSING two followers.  Now, who knows why they really left.  It could have been lots of things.  But I took it personally, and it was the last straw.

So now I've taken a break, thought a lot, and I want to come back and be funny again.  When I started this blog, it wasn't all sewing projects.  It was cooking, kid things, and rants about life in my mommyhood.  So while I'll still show off things I made, I hope you'll still read my other posts, too!

Thanks for letting me take a break.  Now lets get this party started back up!


I don't think I ever wrote about this activity we did.  

It started off simple enough:  a pile of beads, and a bunch of pipe cleaners.  I was thinking fine motor skills mixed with craft time.  Pretty open ended.


and then, because why not, we added a big pile of feathers:


I'm not sure what I imagine Raina would do with this pile of goodies, but I didn't expect her to build a person and give it feather hair!  I helped with the mouth (chin?), but everything else was all miss Raina!  

Then, from the feathers, a question came up...


"WHY ARE THESE ALL PURPLE, BUT THEY ARE ALL DIFFERENT?"

Aaaah, the question the art student and color lover in me has been waiting for!  I'm so looking forward a whole new chapter of color explorations stemming from this!  Do you think Home Depot will mind if I clear them out of paint samples this weekend??


Wednesday, July 25, 2012

Blankets blankets everywhere...

Some weeks it might seem like I don't get much done in the sewing/crafting/cooking land.  When that happens, I'm usually waist deep in a pile of minky dot, ribbons, and fusible interfacing.  Baby blankets!!!!

My Etsy shop can go from no hits for weeks to 100 in a day (who the heck knows why - Etsy is a beast that few understand), meaning up to a dozen orders at one time.  Pile on top of that the multitude of baby showers I've been invited to this summer (read: baby shower invite = free blanket!) and I've decided to just start buying minky dot by the bolt!

Some new twists:  different colored minky, flannel backs, some awesome custom color combos, blankets secured with a headband for little girls to be.

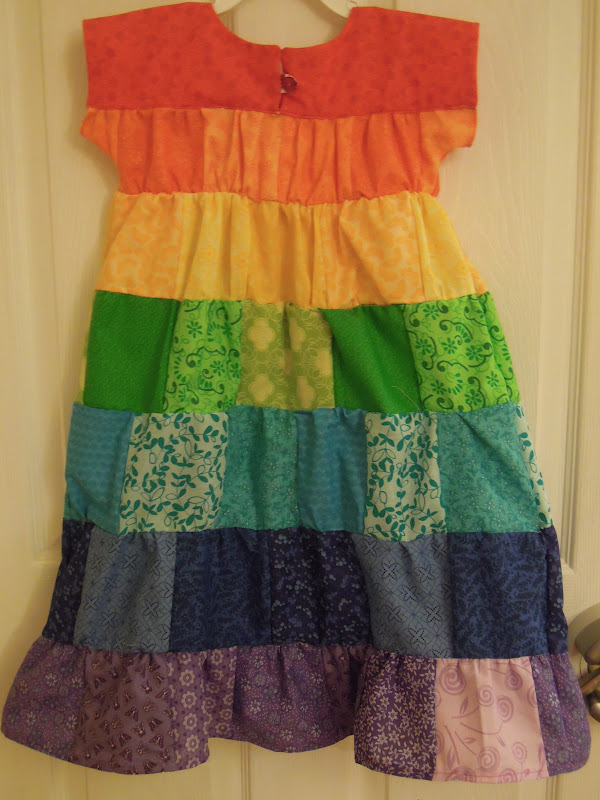
I love having loads of blankets to work on at one time.  Once the girlies are tucked into their beds (which is a longer process some nights than others!), out comes the ribbon box, the bag full of fat quarters in every color of the rainbow, the iron I've gummed up the bottom of...  Oh wait, that last one is a little less glamorous sounding.  I really should get my own craft iron and stop making hubs clean the iron every time he needs to iron a shirt for work. (Pshaw!)  Or maybe I'll get HIM a new one! Does that sound as hilarious to anyone else as it does to me?

The only thing that is decidedly NOT fun about making these blankets is that it is SUMMER, people!  I'm spending muggy and hot summer nights swimming in piles of a fabric described as "Soft and Cuddly!"  Can you say WARM?  Slightly.  But worth it, when I imagine all the tiny little fingers, toes, and soft little bums that will enjoy their blankies...


I truly love finding out the name of every little lady or gentleman that is going to receive a blanket!  Names I had never considered, names that remind me of someone, names that are nice and long and allow for lots of rainbow-y goodness, names that have no curvy letters... (Some nights I think I might start charging extra for names with lots of curves in them.  I don't really mean it, but it takes a lot more concentration to sew around an "O" than it does a "T"  Not all blankets get photographed.  Some mornings I'm just putting the finishing touches on one when shipping time comes, so it goes from my hands to the USPS' without ever seeing the flash of my camera!  Some names that didn't make the collage:  Sophie, Madrid, Hollis, Myles.  


I just made this custom order -  a puppy themed blanket for a little guy names Connor.  It came out pretty dang cute (dang = new favorite word), and I'm thinking about adding it as a selection in the shop.

 Speaking of selection in the shop...

These are the blanket colors I currently offer:


light blue, light yellow, light green, pink, and white.


These are the colors I'm considering adding:


light purple, very pale pink, bright purple, bright blue, teal.

PURPLE!
:)


A few orders lately have been sent with hair accessories for little girls... using the headband as a tie for the blanket adds a fancy little touch that I kind of love.  Maybe bowties for boys?  

So yeah.  Go visit my Etsy Shop!  Do YOU have any suggestions for blanket options you'd like to see?


Tuesday, April 24, 2012

Raina's Rainbow Dress (gown?)


I've been dreaming of this one for a while now.  I made it in a 3T instead of my usual 2T for Raina because I want it to fit for a while... and, uh, I guess I succeeded!  My first thought when she tried it on was along the lines of, "Wow!  Toddler rainbow mumu!  Awesome!"  But she can totally pull it off.  Especially out in public, topped with her dino hoodie!

This is the pile of fabric that inspired me to get started:


I Started with the Oliver & S Ice Cream dress pattern that I used a few weeks ago.  I used that to make the top (red piece) of the dress, and then I used the rest of the pattern pieces to create a basic shape for the bottom.  I divided the bottom into sections, and then started cutting!


I really just went with it on this part.  I didn't measure the squares at all, and didn't iron the fabric.  Bad seamstress Mommy.  But since they were going to be gathered and cut in the end anyway, it didn't seem like a big deal.  And really, it wasn't.  Honestly, I used the fold lines on the fat quarters as my cutting lines!  They ended up being basically uniform, with just a few pieces straying from the norm.  I ended up with rainbow patchwork rows:

I sewed the top of each with a basting stitch, gathered it, and started sewing them together from purple up to orange, making sure each row was slightly smaller in circumference than the one before.  When I got to orange, I gathered it to the measurement of the bodice top, and resumed following the Ice Cream Dress pattern to sew it together.  The bottom was hemmed last, with what seemed like 100 yards of pink thread!  :)


I love that it still has the v notch in the neckline...


but I ended up scrapping the bottom piece of the original pattern and just hemming a row of squares.  It's not as heavy this way, allowing more twirl factor.  Which, if you have a 3 year old girl, you know is supremely important!


The button loop is sewn from a different piece of red fabric, and the button itself is a simple shiny red little thing.


Rainbow dresses are good for lots of things!
Getting into your paint...


Snuggling your little sister...
 

Playing with your little sister...


Dressing tiny princesses...


and even putting tiny princesses in their beds!


Rainbow dresses are also good for dancing in puddles, layering with all the striped clothing in your wardrobe, playing rainbow snail (wish I had pictures of this!), and eating quesadillas.  They are not good for napping, though.  You must change back into your princess nightgown for that!


Go forth!  Sew yourself a rainbow and dance!

Friday, April 20, 2012

Art man gets a new life

I've had this bendy art man since college.  He was all sad and boring in his unfinished wood outfit.  So Raina and I made him pretty.  

We painted him first.  "ALL colors!," to quote Raina!


Then we modge podge and glittered the heck off this dude.


Now he can stretch with confidence!  


No more plain armpits!  Nothing to be ashamed about!

\

You are beautiful, art man!


I don't know what exactly we are going to do with him now.  I thought he should move into the princess castle, but that idea was vetoed.  For now he sits on a shelf above my sewing table... reminding me to be different.  :)


Then I tried to convince Raina that we should fancy up this little zebra.  I failed.


In case you were unsure, we got messy.  As usual.  


Paint dancing is a perfect way to start your day!


Sunday, April 1, 2012

Rawr! Rainbowsauraus Rex Hoodies


Hoodies are awesome, but sometimes you just need to fancy them up a bit, you know?  

Most of the time I add ruffles to things.  But my girls have lots of ruffles.  I wanted something fun and silly and cute.  DINOSAURS!  Not always the words picked to describe them, but translated through felt and cute little hoods, I knew they would fit the bill!

First I grabbed two hoods from upstairs, one for each girl.  Lucca's is gray, Raina's is light green.  Today when I was doing the laundry I came across a red hood of Lucca's and I am so templted to do this again!  Maybe a gift?  Hm.

Next step, felt.  I happen to have a box full of it, so we went rainbow.  You could also stick with just one color.  Fold the felt in half, and cut a triangle on the fold.  I kind of guessed on the size, looking at the hood and cutting what seemed like an appropriately sized spike.  I ended up having to trim them all down smaller so that I could fit on more colors.  The smart thing to do would probably be to measure from the edge of the hood to the bottom of the back, then divide by how many spikes you want to figure out how long the base of each should be.  Math.  Or, you can just go for it and adjust as necessary!  :)


Once you've got a bunch of colorful diamonds, arrange them in order of how you want them to be pinned.  Find the center, and line up the side points on that center.  I was moderately precise, and it worked out well.  I just kept folding the fabric in half as I went... I'm sure it's a little off, but it looks perfect to met!  


Once they are all pinned on, sew a line down the center.


Then fold all spikes back up together and pin.  Each spike will be double thickness, giving it more stability.  Sew the spikes closed.  I matched thread to spike, but I thought about doing the whole thing one color.  If I had had silver thread I may have done them all one color, but I'm really happy with the way it turned out!  


And that's it!

You could stop there, but I added some extra RAWR!  I have a pile of scrap fabric already fused onto wonder under that makes itself useful from time to time.  (They're scraps from personalizing my taggie blankets!)  I cut some letters from the scraps and ironed "rAWr" onto each hoodie.  Exactly the finishing touch I was looking for!  


(Hoodies, dino-style)


And now for the best part... the dinos themsleves!  Here we have the elusive Lucca-dactyl and Raina-saurus in their natural habitat.  Rarely seen creatures!  


dino kisses

dino hugs

counting sister's spikes


RAWR!


seriously cute.  OMG.