Last week was kids clothes week challenge!
I was excited, but tried not to be. :) Some weeks I'm super productive when it comes to sewing... but some weeks I'm lucky if I get a pattern traced and cut! So I decided to follow KCWC in secret, just to see if I could do it. The commitment? One hour of kids related sewing a day for 7 days. Seems pretty attainable... but things happen. (Like no naps, babies pulling all nighters, spilled toddler potties, grocery store melt downs, Dora movie-thons... you get the picture!)
Somehow, though... I did it! One hour a day, and I came away with 6 completed sewing projects, one nearly complete one, and a finished quilt that had nothing to do with kids clothes. :) I'm feeling pretty accomplished!
One day I spent as much time battling with my sewing machine as I spent sewing.
One day I fought with a seam ripper.
One day I sewed while a handyman played under my kitchen sink.
Many times I sewed while Lucca jumped to her heart's content in her jumperoo.
Many times I drank too much coffee and didn't sleep enough. :)
EVERY time I was so thrilled when I was finished that it didn't matter!
 |
| Raina's Gigi Dress |
 |
| The rainbow gown |
 |
| treasure pocket pants |
 |
| Snow White raglan |
 |
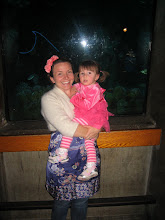
| Lucca's Gigi Dress |
 |
| strawberry shortcake popover sundress |
(all except Lucca's Gigi dress have posts up about them... watch for the last one this week!)
It's been so much fun getting inspiration from the host blog and from the KCWC flickr pool. I have a million and one more things I want to make now!
...and now, in the wake of all this kids sewing, I've realized that while I do loads of sewing, I've never made anything for myself! So my next project, out here for everyone to see and call me on if I stall... is to make something for ME! I started a pinterest board with ideas... if you have any you think I need to add, please leave me a comment! I've got some fabric stacked, some ideas in mind... now it's time to put my nose to the sewing machine and get going!